Installing free-hanging blinds is a practical and stylish way to control light and privacy in your home. Whether you have windows without traditional frames or simply prefer the sleek look of blinds that hang freely, understanding the correct mounting techniques is essential for a secure and attractive finish.
What Are Free-Hanging Blinds?
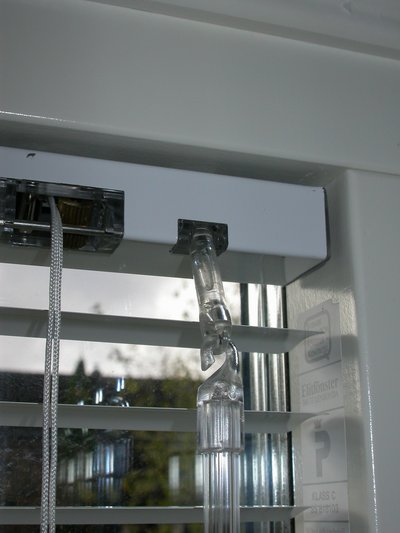
Free-hanging blinds are window coverings that are suspended from brackets mounted above the window, allowing the blind to hang freely without being attached directly to the window frame. This style is particularly suitable for windows without a defined frame or for those seeking a minimalist aesthetic.
Choosing the Right Brackets
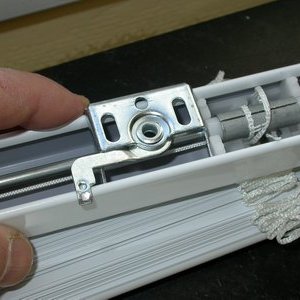
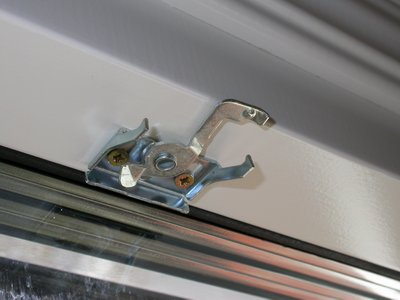
Selecting the appropriate brackets is key to a successful installation. Typically, free-hanging blinds require sturdy top-fix brackets that can support the weight of the blind and allow smooth operation. Consider the following:
- Material: Aluminium or steel brackets offer durability and strength.
- Type: Choose brackets designed specifically for free-hanging blinds to ensure compatibility.
- Quantity: Use enough brackets to evenly distribute the blind’s weight and prevent sagging.
Measuring for Free-Hanging Blinds
Accurate measurements are crucial for a neat and functional installation. Follow these steps:
- Width: Measure the full width of the window opening or the desired coverage area. Add extra width if you want the blind to extend beyond the window frame for better light control.
- Drop (Length): Measure from the top mounting point down to where you want the blind to end, typically the window sill or just below.
- Check Level: Use a spirit level to ensure your mounting surface is even, which helps the blind hang straight.
Step-by-Step Installation Guide
Follow these general steps to mount your free-hanging blinds:
- Mark Bracket Positions: Using your measurements, mark the points where the brackets will be fixed. Ensure they are level and evenly spaced.
- Drill Holes: Carefully drill pilot holes for the screws, taking care not to damage the wall or window surround.
- Attach Brackets: Secure the brackets firmly with appropriate screws and wall plugs if necessary.
- Fit the Blind: Clip or slide the blind into the brackets according to the manufacturer’s instructions.
- Test Operation: Raise and lower the blind to ensure smooth movement and stability.
Tips for a Professional Finish
- Double-check all measurements before drilling to avoid errors.
- Use a spirit level throughout the process to keep brackets and blinds perfectly horizontal.
- If mounting on drywall or plaster, use suitable wall anchors for a secure fit.
- Consider custom-made blinds for an exact fit and tailored appearance.
Conclusion
Free-hanging blinds offer a versatile and elegant window treatment option, especially for windows without traditional frames. By choosing the right brackets, measuring carefully, and following a systematic installation process, you can achieve a neat, stable, and attractive result. For bespoke aluminium Venetian blinds and expert advice, explore the range available at Persienner-Online.se.